Building an Orrery: Planets!

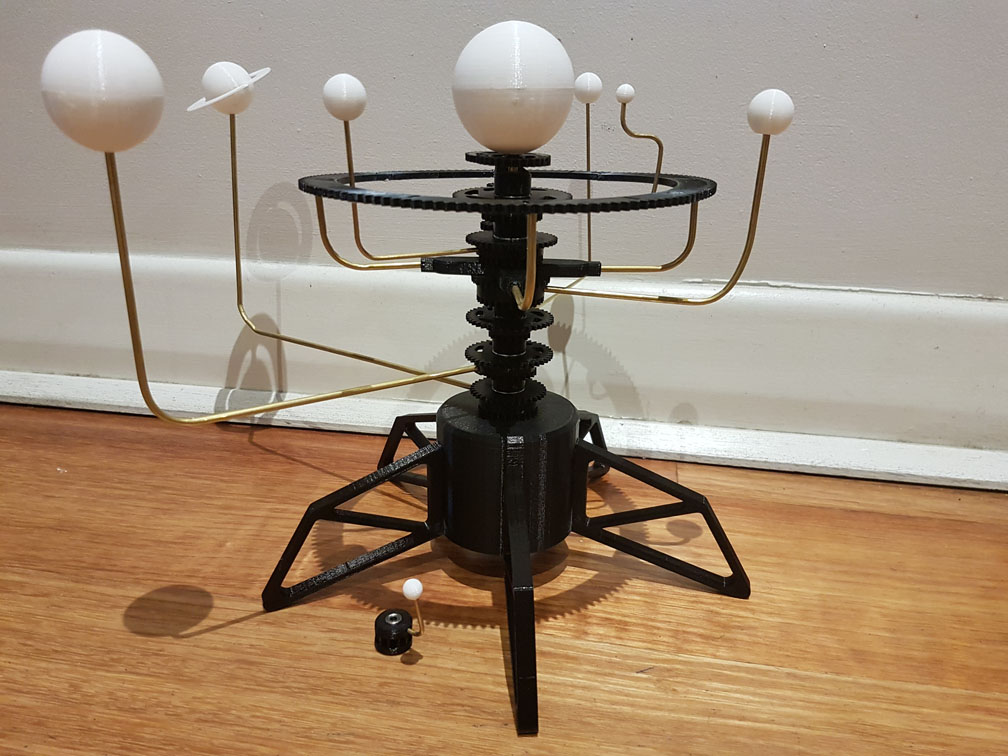
Now with the gear set assembled and turning nicely (I could hand-crank it by turning the central shaft from below the base), it’s time to add the main attraction of the planets.
Each planet was first fitted to its corresponding orbit rod and attached to the corresponding gear. For this step I worked top-to-bottom so the smallest orbits were in place first. Again some parts were easy to fit onto the rod, but I ended up using superglue on some planets and their gears so they wouldn’t slide down to a right angle or come off altogether.
I had some difficulty in gluing the large ring gear which is used to orbit the Moon about Earth. As this was my first proper 3D printed project I hadn’t experimented with the correct glue to use with PLA plastic. I had used acetone to weld ABS in the past with parts printed from others’ printers but this was my first experience with PLA. I had some generic superglue but due to the narrow thickness of the ring this glue did not hold and the parts would separate. I was running out of time for Christmas however so at this stage of the build I was just looking to have it remotely together so Dad would get the right idea! (Definitely number 1 daughter status with a half-finished present!) I also had all sorts of trouble trying to fit the moon rod into the gear to allow it to orbit using this ring gear, as you can see in the following pictures I ended up leaving it off for now as I’d possibly need to remove it and the big ring to add the motorised components.

So this is the state it was in to give to Dad, it came with a big not-quite-finished disclaimer but dad loved it! I can’t wait to see his face when I finally get it actually completed with all of the motorised parts and possibly a light-up Sun too.