Soldering the Electronics and Finishing the LED Cube
After successfully programming the chip and testing the cube connected using a breadboard, I connected the electronics using Perfboard to make for a better display.
Please note throughout this project I was referring heavily to this Instructible
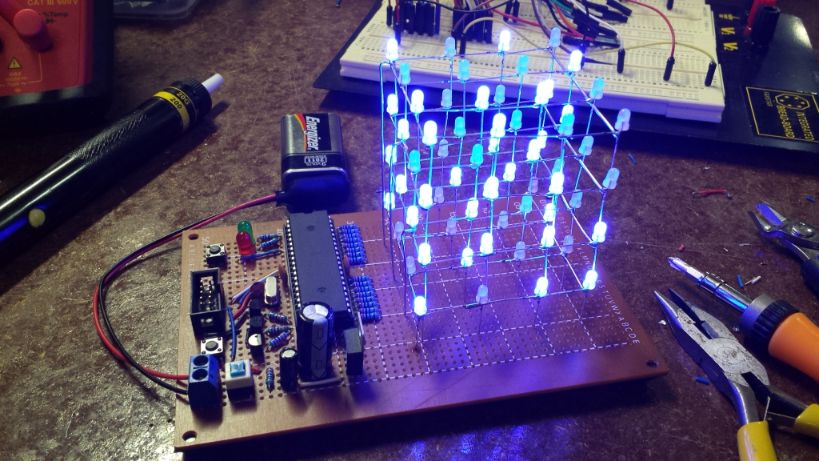
With the electronics working I decided to move the cube onto a more permanent solution from the breadboard - Perfboard. I used Perfboard as both the electronics board and the baseboard for this project as I could more easily secure the cube and connect the electronics in one swoop. I also wanted the electronics on display for this project.
First I soldered the main electronics:


I then soldered the LED cube; it needed nothing other than solder to secure it to the board.

The underside of the board was an interesting challenge, I used a lot of jumper wires to clean up the perfboard but as the rubber feet were quite small there was not a lot of room to overlap the wires.


Finished Cube!
Without much further ado it’s time for the big reveal!